How to Support Fullscreen PDFs on iOS 13
OCT 20, 2019 github contact
On previous versions of iOS, you could generate PDF versions of your app's content by using the system UI for printing, though it wasn't always obvious to users how to create a PDF. With iOS 13, PDF generation is much more discoverable, allowing users to create a fullscreen PDF from the markup modal that appears after taking a screenshot, but it involves using iOS 13's new UIScreenshotService. Today, we'll take a look at both the old and the new APIs and when you might want to use one over the other.
Printing APIs
First things first, if you want to support printing you'll want to use UIKit printing APIs. For a nice overview of all of them, I recommend this NSHipster post, which goes in depth. For us, we'll focus on the most common one that allows PDF generation, which is adding a print action in an UIActivityViewController.
To add a print action in a UIActivityViewController, it is as simple as including a UIPrintFormatter as one of the activityItems your UIActivityViewController is initialized with, where UIPrintFormatter is an abstract superclass that will contain code for drawing your content into a PDF context.
Thankfully, a number of UIKit and MapKit views will provide a formatter for you, saving you from having to write custom drawing code yourself. Those views include UITextView, UIWebView, and MKMapView. For those views, simply call viewPrintFormatter() to receive a UIPrintFormatter that you can then pass on to your UIActivityViewController. For example, the code snippet below shows how you might share a weblink to some of the content in your app while also adding a print action for the content loaded into a UITextView.
    let printFormatter = textView.viewPrintFormatter()
    let activityViewController = UIActivityViewController(activityItems: [shareURL, printFormatter], applicationActivities: nil)
    activityViewController.popoverPresentationController?.barButtonItem = sender
    present(activityViewController, animated: true)
After the UIActivityViewController is launched, the user can select the "Print" action which will then show the printer picker and thumbnail previews of the rendered document. Using the pinch-to-zoom gesture will cause the document to enlarge and take up the whole screen. From there, tapping the action button at the top right in the navigation bar will allow the document to be shared as a PDF.
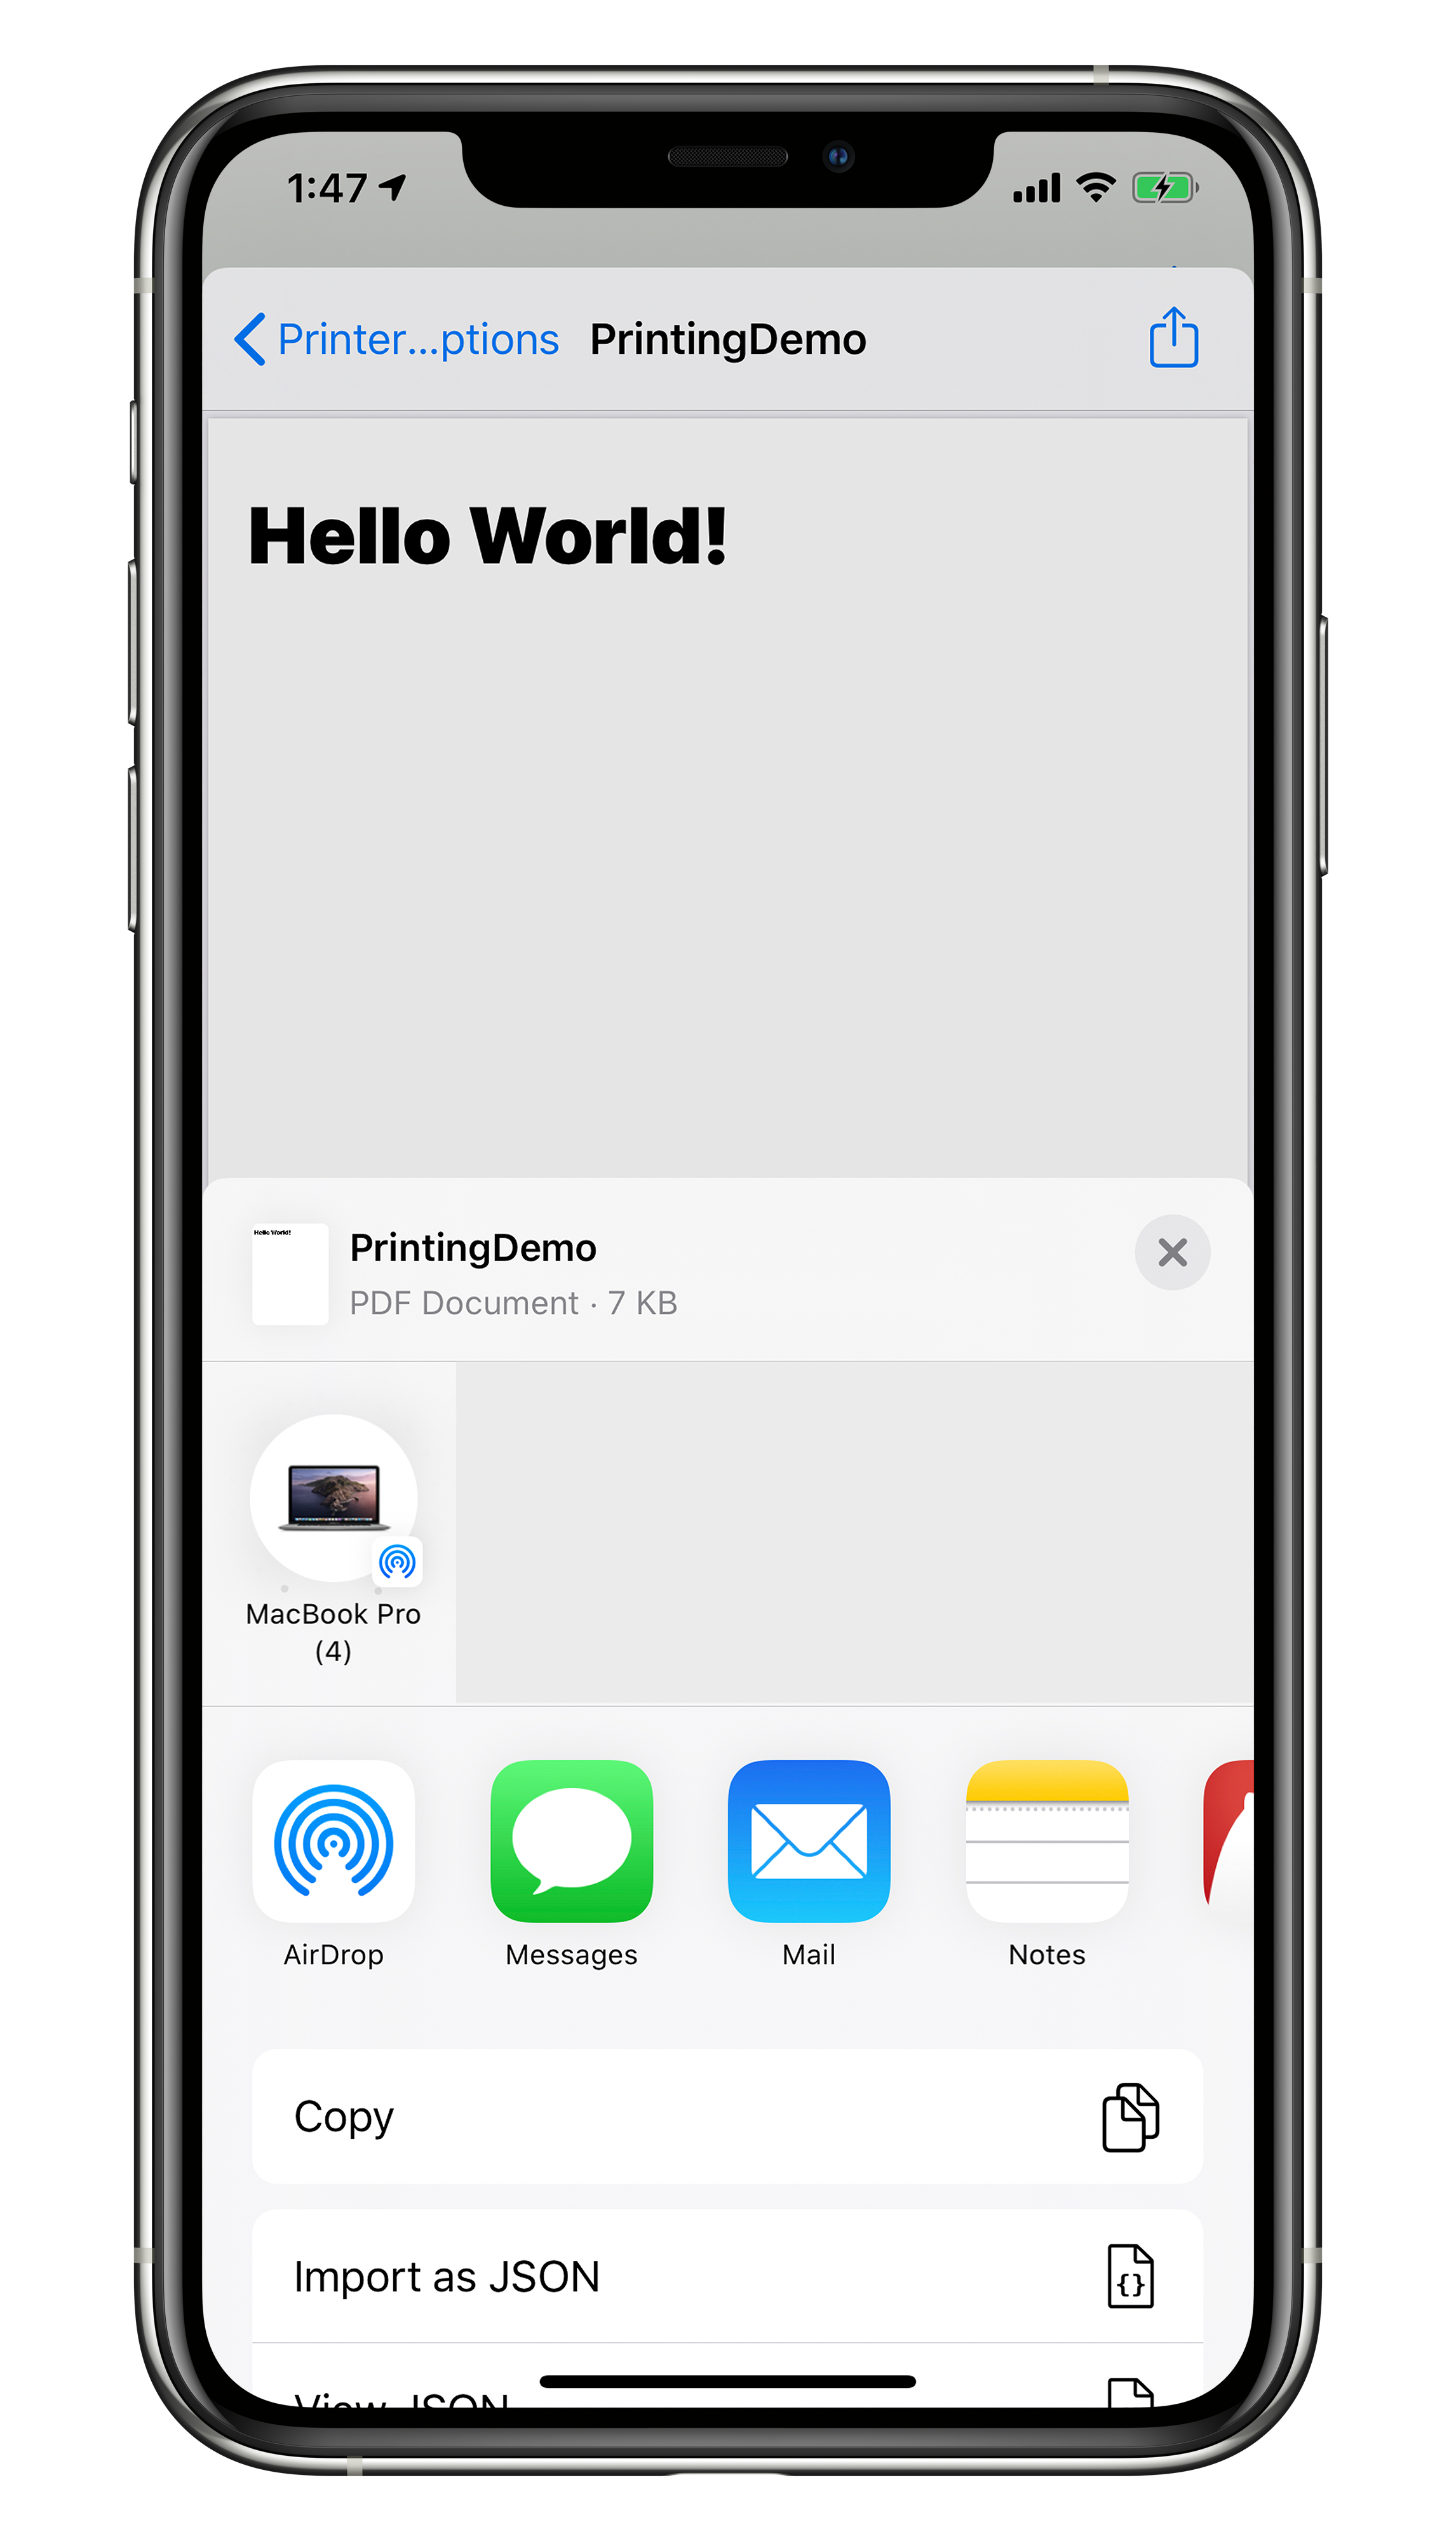
UIActivityViewController.
Some of the nice aspects of this method are, if your app is composed of a lot of HTML or NSAttributedStrings rendered in a UITextView, than it is trivial to support PDFs and printing. Also, things like page size and some of the PDF metadata are handled for you.
There are also some pretty large draw backs. As mentioned before it is not obvious to users that they can use the print action to generate a PDF, and even if they were aware of this, it's difficult to remember how to activate (using the zoom gesture) the PDF sharing mechanism. If you have custom rendering needs, you might find yourself having to subclass various renderer and formatter classes with the role of each class being somewhat opaque without reading the documentation.
Screenshot APIs
With iOS 13, UIKit introduced UIScreenshotService and its cooresponding delegate UIScreenshotServiceDelegate in the WWDC 2019 session Introducing PencilKit. This API provides a new way for apps to vend PDF data when a user screenshots a view inside an app.
In order to supply the system with PDF data, you'll supply a delegate for the UIScreenshotService that's a property on key window scene. For example, assuming we want to provide PDF data for a view controller that's onscreen, in our view controller's viewDidAppear method we could say something like the following:
    override func viewDidAppear(_ animated: Bool) {
        super.viewDidAppear(animated)
        if #available(iOS 13.0, *) {
            view.window?.windowScene?.screenshotService?.delegate = self
        }
    }
Next, we'll need to have our view controller conform to UIScreenshotServiceDelegate and have our view controller implement the optional delegate method generatePDFRepresentationWithCompletion. Before we look at some possible implementations of this method, it's important to first understand what's expected to happen when this method is called.
It's called when the UIScreenshotService needs PDF data for a "Full Page" representation of a screenshot. That is, the user has taken a screenshot, and the system wants to be informed of a possible PDF version of the information contained on the entire screen. The delegate can create the PDF data and then call the completion handler passing in the PDF data, the page number of the current page, and a CGRect of the currently visible portion of the PDF.
All of that sounds easy enough, but one thing to keep in mind is that while UIKit's origin is in the top left, PDFs use the bottom left for coordinate (0, 0). Also because the completionHandler is @escaping it can be called asynchronously, meaning you can request resources from a server or perform computationally intensive tasks on a background thread then call the completion.
That should be enough theory; now, let's get started by looking at how we might supply PDF data for the content of a UITextView.
    // MARK: - UIScreenshotServiceDelegate -
    @available(iOS 13.0, *)
    extension ViewController: UIScreenshotServiceDelegate {

        func screenshotService(_ screenshotService: UIScreenshotService, generatePDFRepresentationWithCompletion completionHandler: @escaping (Data?, Int, CGRect) -> Void) {

            // Rect correcting for PDF's bottom left origin
            let rect = CGRect(x: textView.contentOffset.x, y: textView.contentSize.height - textView.contentOffset.y, width: textView.bounds.width, height: textView.bounds.height)

            // Call completion with data, page 0, and corrected visible rect
            completionHandler(createPage(), 0, rect)
        }

        private func createPage() -> Data {

            // Supply PDF metadata
            let pdfMetaData = [
                kCGPDFContextCreator: "My App",
                kCGPDFContextAuthor: "My App"
            ]

            // Create PDF format
            let format = UIGraphicsPDFRendererFormat()

            // Add metadata
            format.documentInfo = pdfMetaData as [String: Any]

            // Create PDF rect
            let pageRect = CGRect(x: 0, y: 0, width: textView.contentSize.width, height: textView.contentSize.height)

            // Create render with rect and format
            let renderer = UIGraphicsPDFRenderer(bounds: pageRect, format: format)

            // Data from blocked-based drawing code
            let data = renderer.pdfData { (context) in
                context.beginPage()
                textView.attributedText.draw(in: pageRect)
            }

            // Return data
            return data
        }
    }
Let's recap what this code does. First, we construct the visible rect but using PDFs bottom left origin. Then, call the completionHandler with the data we create in a method called createPage(), 0, for the first and only page, and rect, for the visible rect in the PDF.
In createPage(), we use UIGraphicsPDFRenderer block-based render to create PDF data. We start by creating some metadata, then specify a size for the PDF and finally draw our attributed string into the PDF context. Lastly, we return the resulting data.

UIScreenshotServiceDelegate.
This worked well for just some attributed text, though one thing to be aware of is if your app supports dark mode, you'll likely want to account for that in your PDF rendering. While it's generally regarded as better to draw text and images directly (for text and image selection purposes), what if we had a more complicated UI? Rendering each image and line of text individually would be quite burdensome.
Instead, because we're given the PDF context in the block-based UIGraphicsPDFRenderer, we can render our view directly into the context. For example, if we had a scroll view with various subviews we could do something like the following:
    // MARK: - UIScreenshotServiceDelegate -
    @available(iOS 13.0, *)
    extension ViewController: UIScreenshotServiceDelegate {
        func screenshotService(_ screenshotService: UIScreenshotService, generatePDFRepresentationWithCompletion completionHandler: @escaping (Data?, Int, CGRect) -> Void) {
            let rect = CGRect(x: scrollView.contentOffset.x, y: scrollView.contentSize.height - scrollView.contentOffset.y, width: scrollView.bounds.width, height: scrollView.bounds.height)
            completionHandler(createPage(), 1, rect)
        }

        private func createPage() -> Data {
            let pdfMetaData = [
                kCGPDFContextCreator: "My App",
                kCGPDFContextAuthor: "My App"
            ]
            let format = UIGraphicsPDFRendererFormat()
            format.documentInfo = pdfMetaData as [String: Any]
            let pageRect = CGRect(origin: .zero, size: scrollView.contentSize)
            scrollView.clipsToBounds = false
            let renderer = UIGraphicsPDFRenderer(bounds: pageRect, format: format)
            let data = renderer.pdfData { (context) in
                context.beginPage()
                scrollView.layer.render(in: context.cgContext)
            }
            scrollView.clipsToBounds = true
            return data
        }
    }
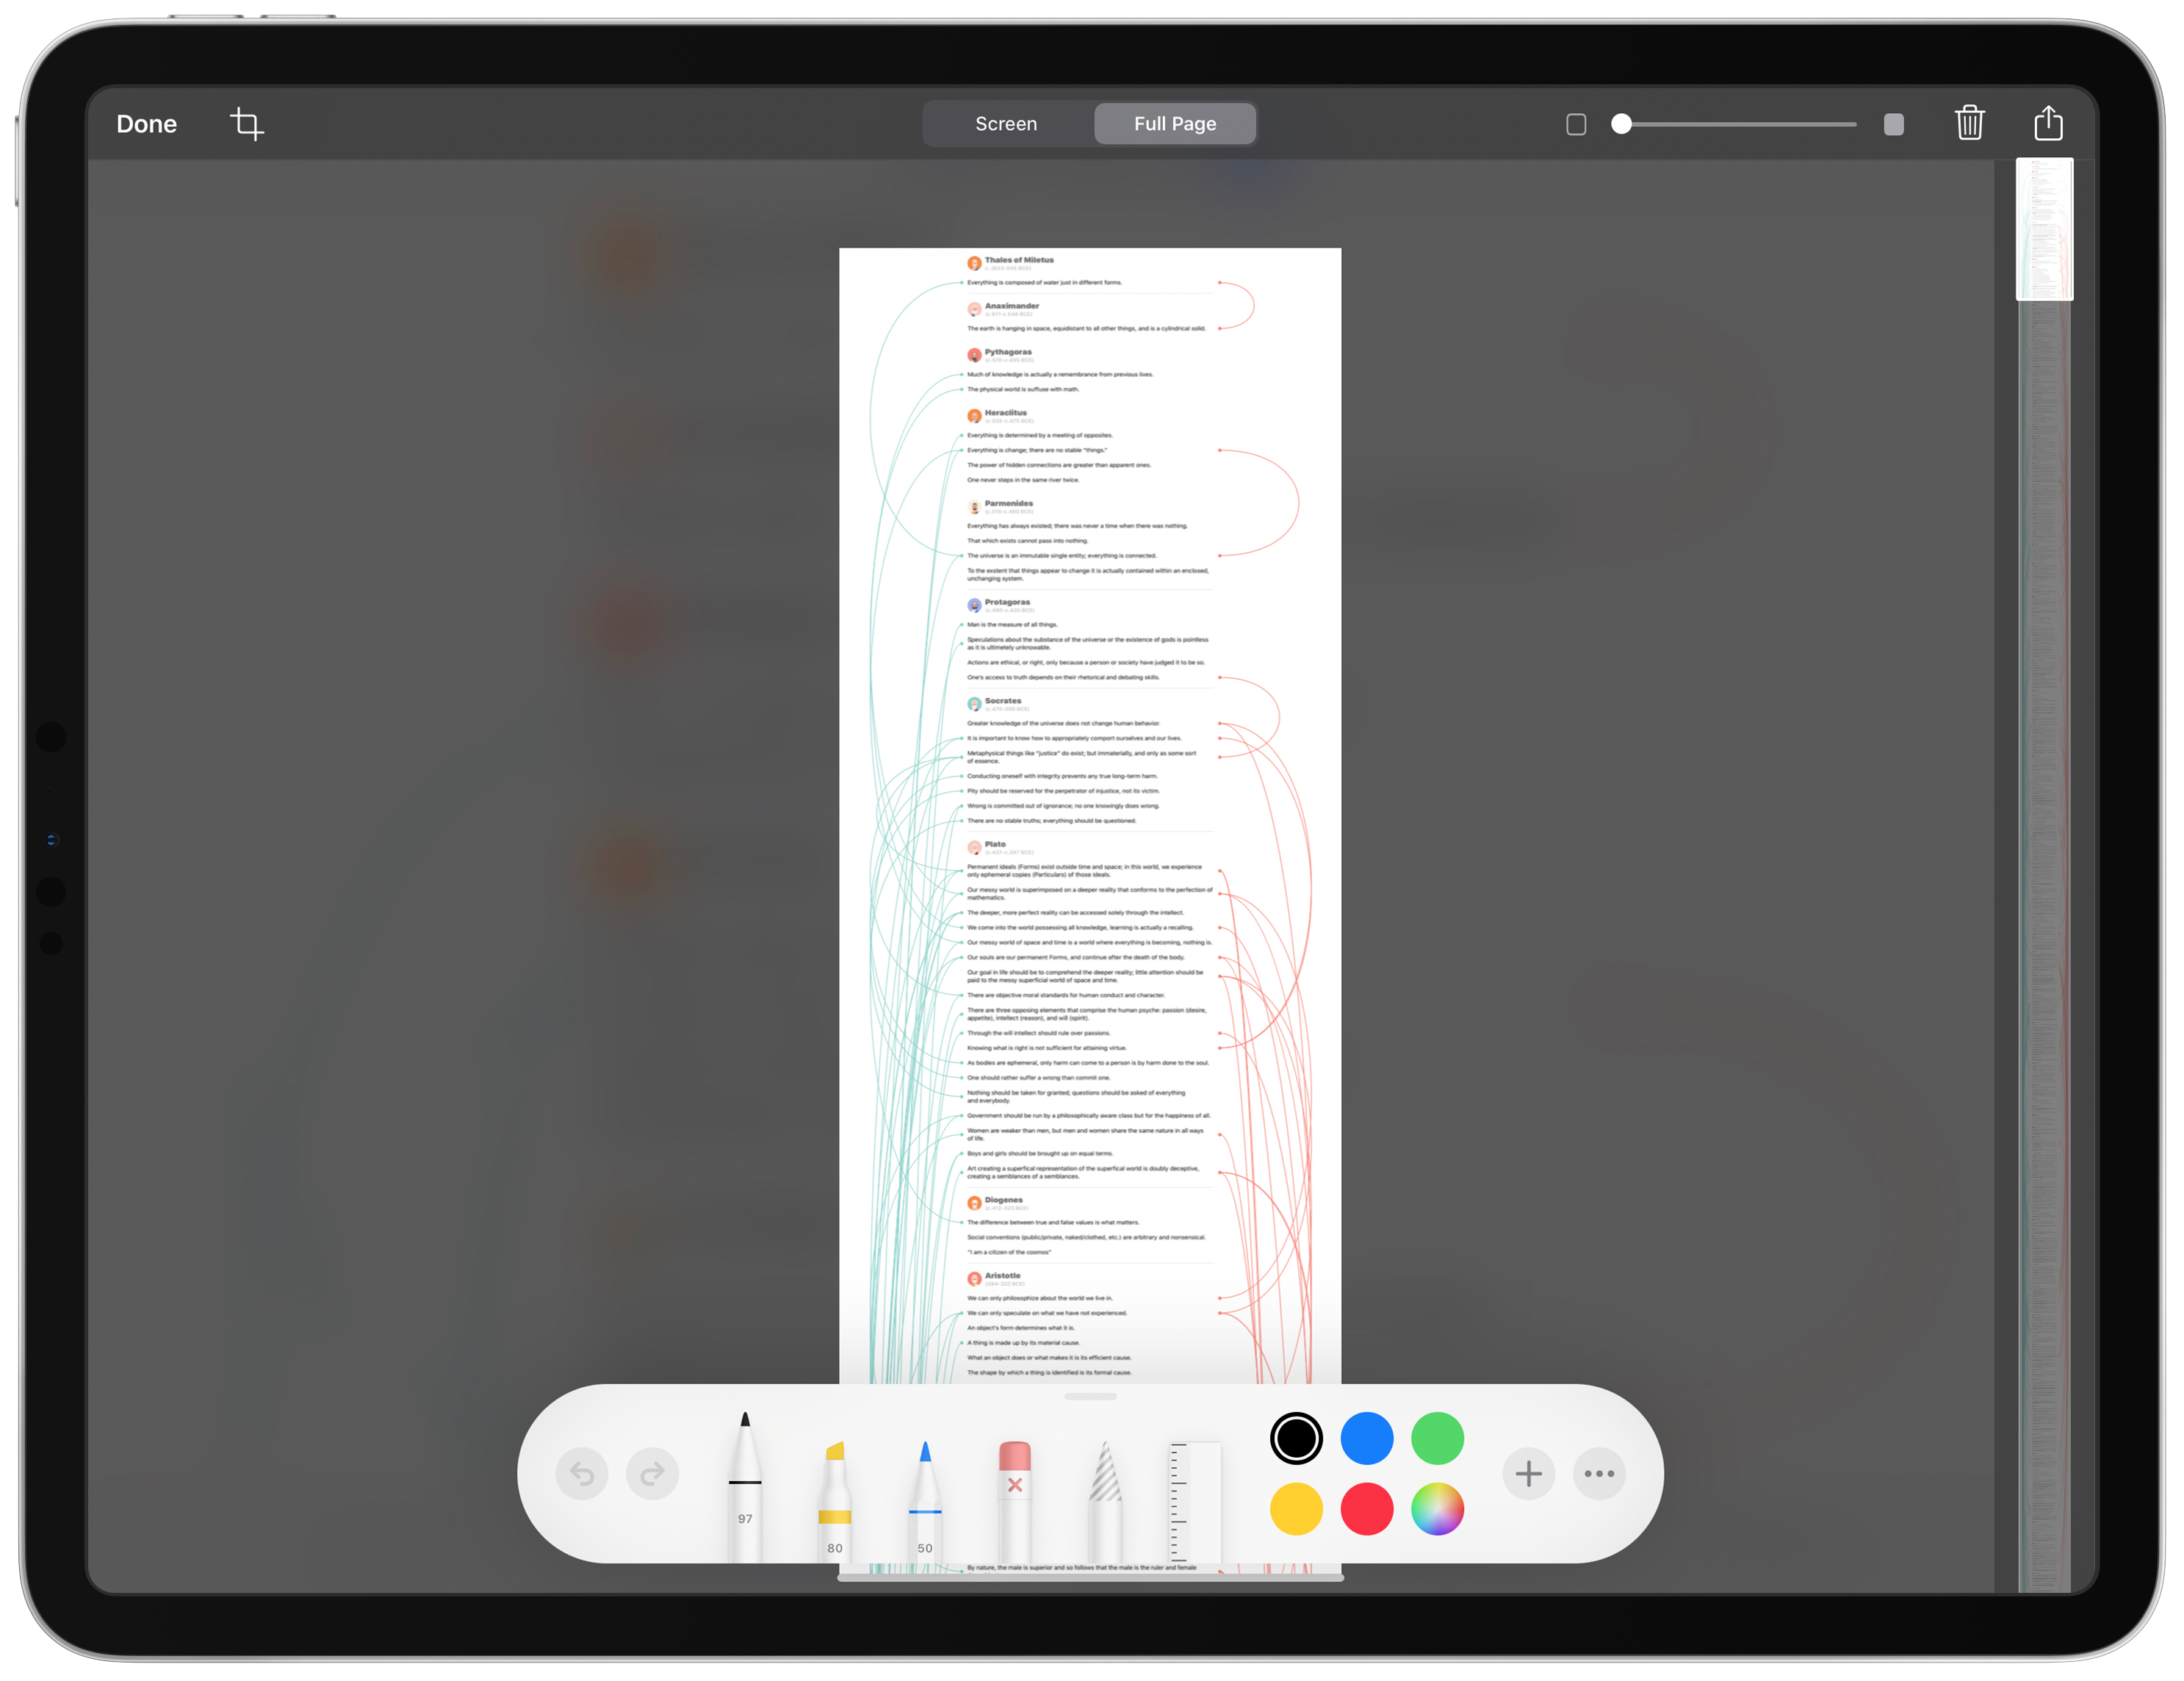
Here, the biggest difference is scrollView.layer.render(in: context.cgContext) where we're render the scroll view's layer directly into the PDF context.
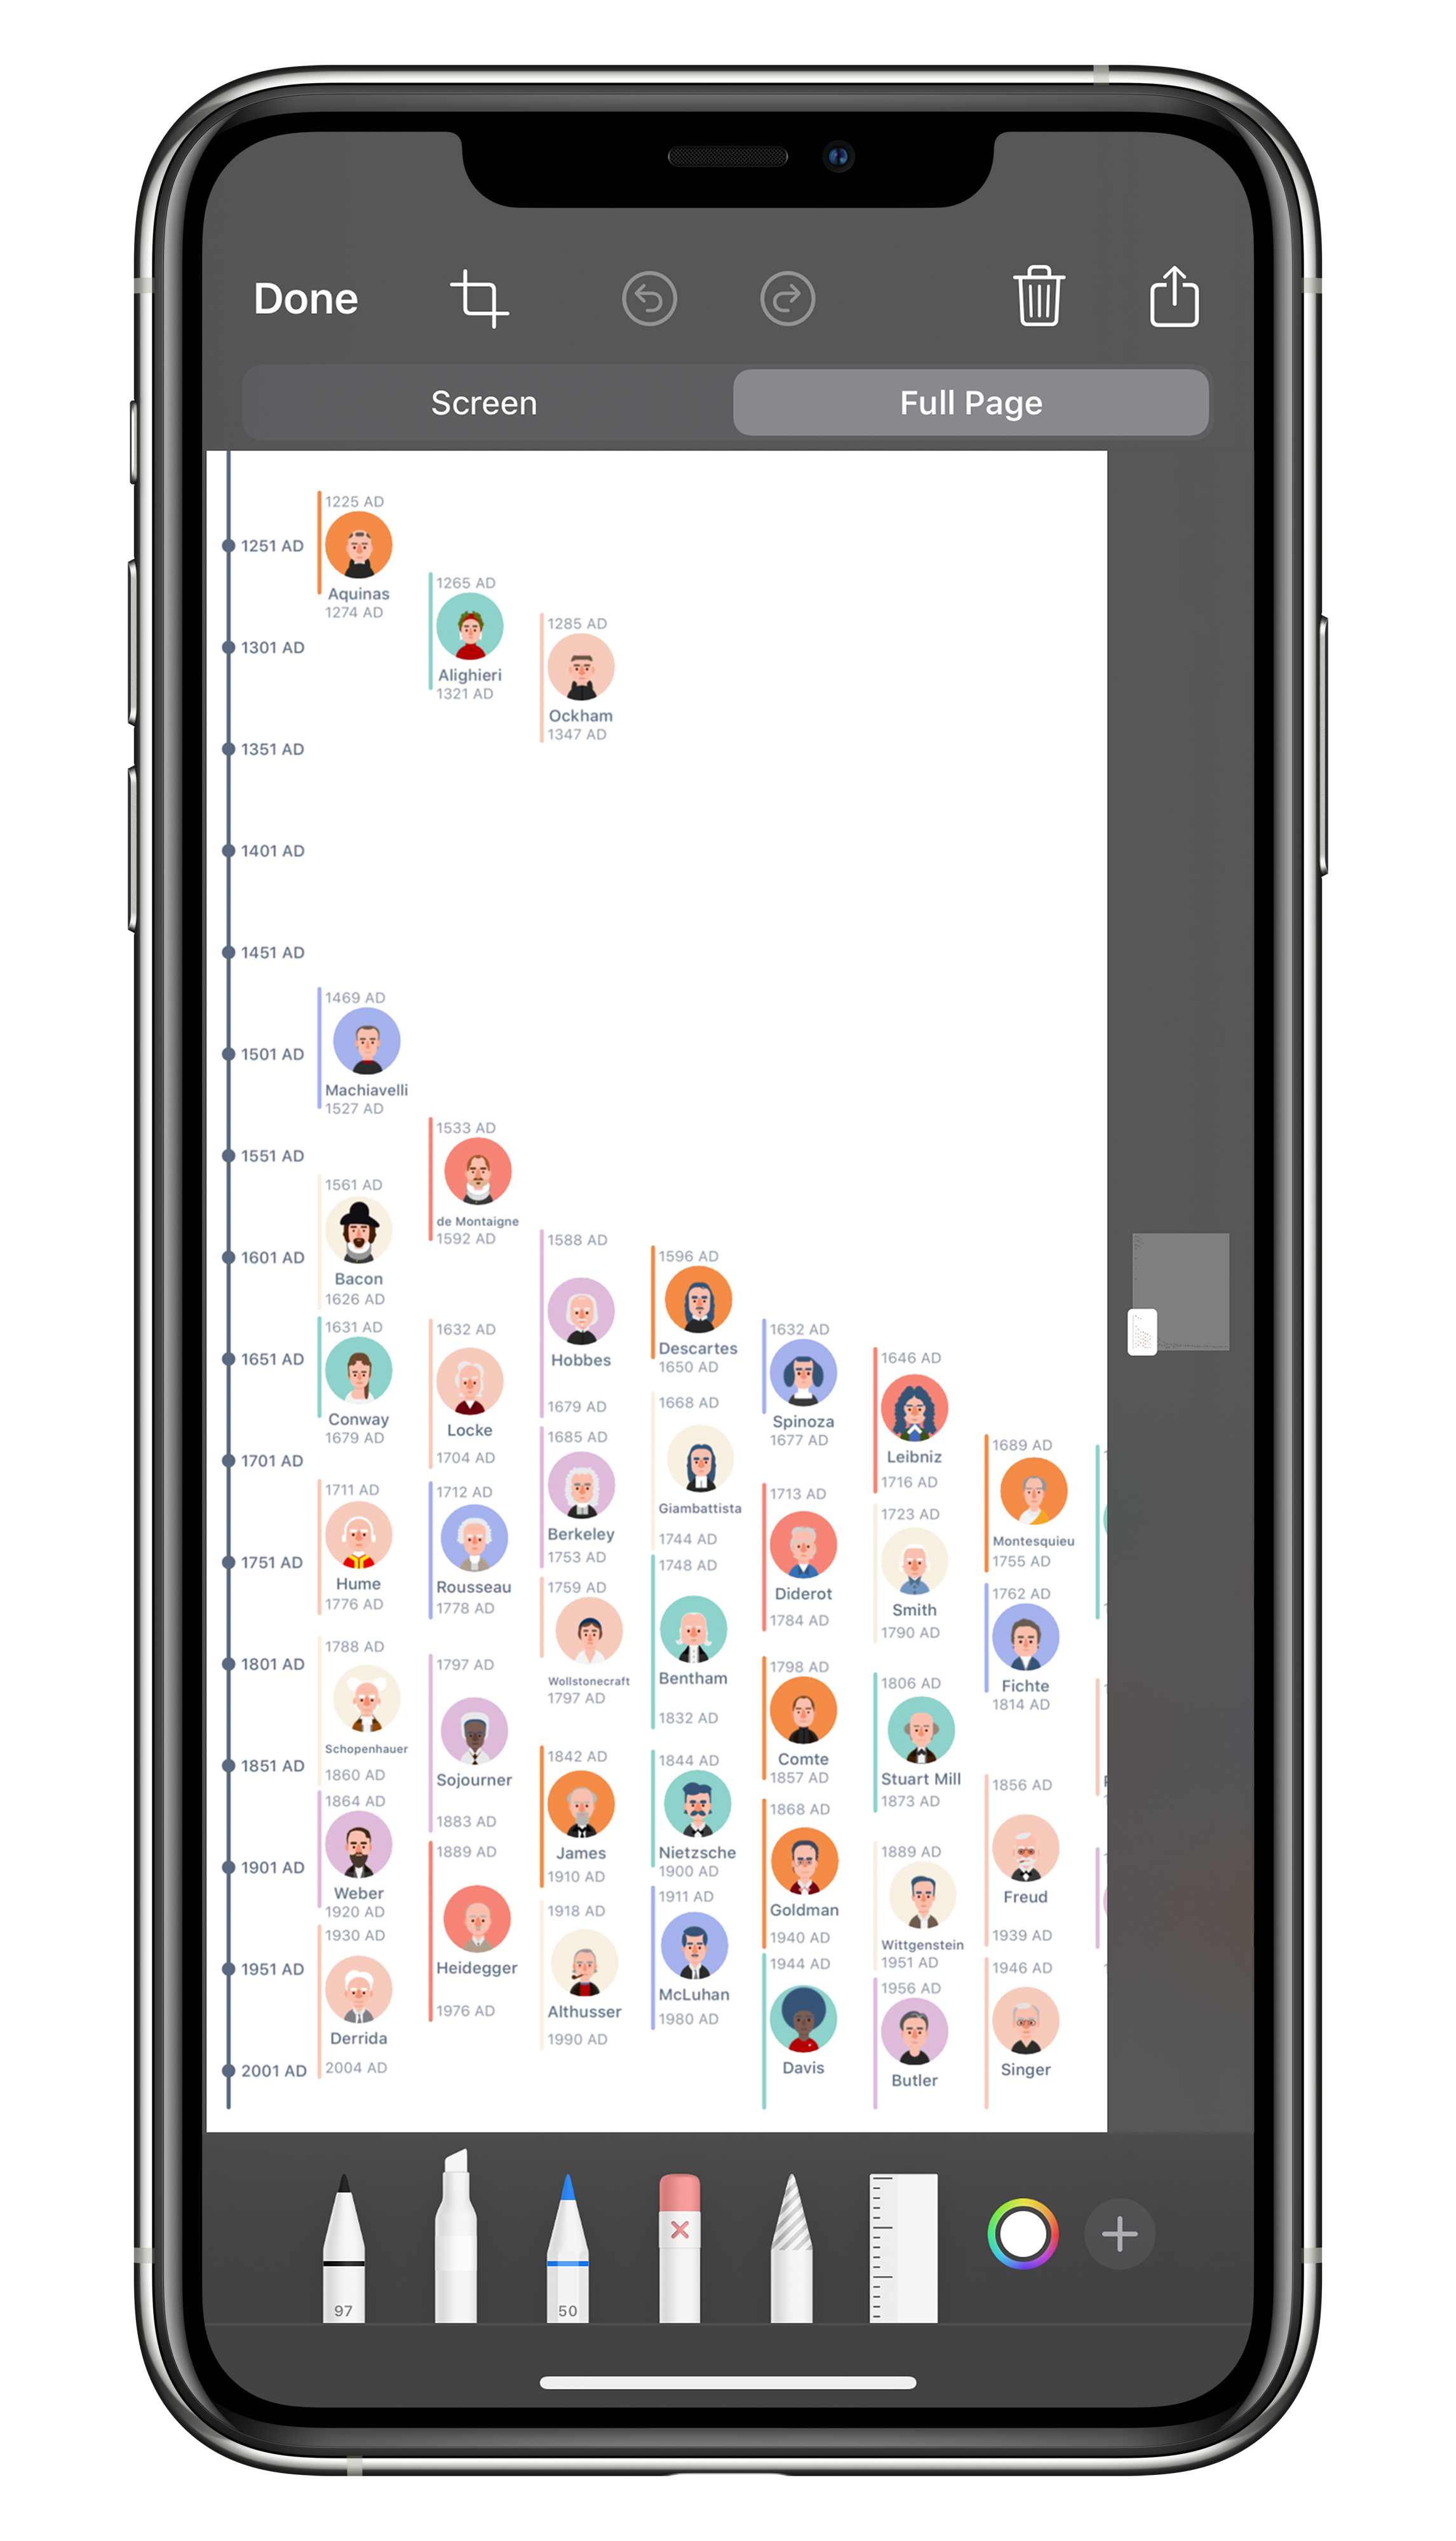
UIScreenshotServiceDelegate for content in a scroll view.
We've successfully recreated our entire scroll view UI in a single PDF. One thing to keep in mind though, for UIScrollView subclasses that recycle views (UITableView and UICollectionView) simply rendering the view's layer will not be enough, as offscreen elements have not been created. One possible technique is to adjust the frame of the view, another is to write custom rendering code.
Some of the nice things about UIScreenshotServiceDelegate API is it is fairly straight forward, no need for subclassing to get custom drawing code. Also, it is highly discoverable by users.
A few drawbacks, you tend to end up creating one large page that might not be suitable for all content. Also, for certain content types you might have to write more code.
And with that, we've seen how we can easily add PDF generation of our app's content. It's a relatively simple way to add some polish to any app, particularly those with text-heavy content that users would like to share and markup. I can see users of apps that feature news articles or cooking recipes really demanding the ability to use these features.
As always, feel free to send me feedback.